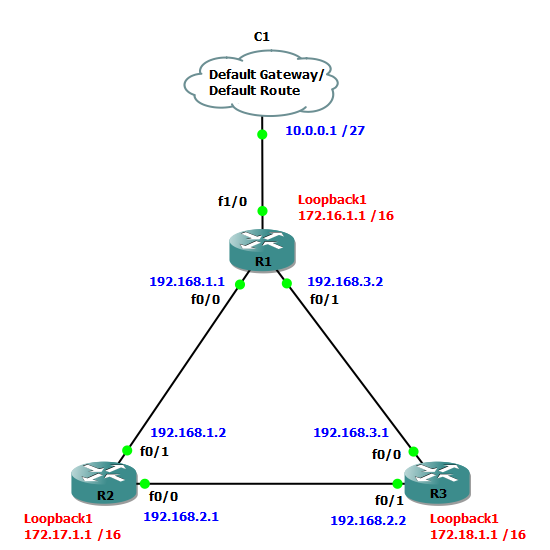
Configuring Hostname on a Cisco Router
One of the first things you want to configure on a router or a switch is the hostname. Although it is mainly important to us administrators (so we can identify our devices easier), the hostname can be used to authenticate one router to another as well, but I’ll talk about that in another post.
configuration
The default name for routers is Router and the default name for switches is … Yes, you guessed right, it is Switch! Now lets rename our router to R1. The command we need is hosname folowed by the desired hostname (in this case R1):
Router>enable
Router#conf terminal
Enter configuration commands, one per line.  End with CNTL/Z.
Router(config)#hostname R1
R1(config)#exit
R1#
*Mar  1 00:07:14: %SYS-5-CONFIG_I: Configured from console by console
R1#copy running-config startup-config
Destination filename [startup-config]?
Building configuration...
[OK]
R1#
The official documentation states that a hostname cannot be longer than 63 characters, must start with a letter and end with a letter or digit. Hyphen is accepted as internal character only. In reality you could start and finish the hostname with either a letter, a digit, a hyphen or an underscore. It’s up to you, but the best practice is to keep it short and simple.
commands explained
Commands used with a brief explanation.
enable: Moves the user from User mode to Privileged mode
conf terminal: Moves the user into Global Configuration mode. This is where you can make changes to the configuration
hostname R1: Sets the hostname to R1
exit: Moves you back one level. In this case back to Privileged mode
copy running-config startup-config: Saves the running configuration into the startup configuration
Destination filename [startup-config]?: Verifies the destination file name. Just press ENTER!